Monday, October 13, 2008

Almond Cookies

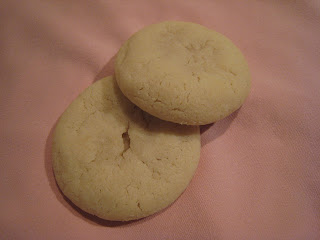
I don't normally buy shortening because I prefer baking with butter. My husband had requested some cookies that called for shortening so I had some left over. I searched the Crisco website and found these. I love the taste of almond extract in baked goods so I gave these a shot. They are very similar to the almond cookies that you may get at the end of a Chinese meal at a restaurant. I did not put the almonds on them. I even made them a second time and added some cherry extract as well. I gave them to three people and they all loved them.
Almond Cookies
1 cup Crisco® All-Vegetable Shortening
OR 1 stick Crisco® All-Vegetable Shortening Sticks
1 cup sugar
1 large egg, lightly beaten
3 tablespoons almond extract
2 1/4 cups Pillsbury BEST® All Purpose Flour
1 1/2 teaspoons baking powder
1/4 teaspoon salt
48 whole almonds
Makes 4 dozen

1. COMBINE shortening and sugar in large bowl. Beat at medium speed with electric mixer until light and fluffy, about 5 minutes. Beat in egg and almond extract until well blended.
2. COMBINE flour, baking powder and salt in medium bowl. Add to shortening mixture; blend well. Wrap dough in plastic wrap; refrigerate 2 hours.
3. HEAT oven to 350ºF. Roll rounded tablespoonfuls of dough into balls. Place on ungreased cookie sheets about 2 inches apart; flatten slightly with fingertips. Gently press an almond into center of each.
4. BAKE 10 to 12 minutes or until cookies are just done but not brown. Cool on cookie sheet 4 minutes; transfer to cooling racks.

Thursday, September 11, 2008

Portobello Gravy

I am a fan of Dr. Oz and Dr. Roizen from RealAge. I get a weekly newsletter on Email from RealAge with the newest health news and sometimes it includes recipes. When I saw this recipe
I was so excited. My husband and I try to eat healthy most of the time. We both love mushrooms so I thought this would be good. It was better than good, it was great! The first time we ate it I poured it over garlic mashed potatoes and a rotisserie chicken from Costco. It was a perfect meal. I had leftovers the next day so I added some fat free half and half. It made a delicious creamy mushroom soup. When you eat this you will be surpised that it is so good for you. If you ate the whole batch it would only be 350 calories. I highly recommend this.
Portobello Gravy
1 tablespoon extra-virgin olive oil
1 each medium onion, finely chopped
2 cloves garlic, minced
1 1/2 cups chopped cleaned portobello mushrooms (2 medium)
2 1/4 cups vegetable broth
3 tablespoons tamari or reduced-sodium soy sauce
1/4 teaspoon dried thyme leaves
1/8 teaspoon crumbled dried sage
1 tablespoon cornstarch
2 tablespoons water
Freshly ground pepper to taste
1. Heat oil in a medium saucepan over medium heat. Add onion and garlic; cook, stirring often, until softened, about 5 minutes. Add mushrooms and cook, stirring often, until they begin to release their juices, about 10 minutes.
2. Add broth, tamari (or soy sauce), thyme and sage; simmer for 10 minutes. Mix cornstarch and water in a small bowl. Stir into the sauce and simmer, stirring often, until slightly thickened, about 10 minutes more. Season with pepper. If you prefer a smooth gravy, pass it through a fine sieve (discard mushrooms and onions). Serve hot.

Per serving (8 servings)
Calories: 44
Carbohydrates: 5g
Fat: 2g
Saturated Fat: 0g
Monounsaturated Fat: 1g
Protein: 1g
Cholesterol: 0mg
Dietary Fiber: 1g
Potassium: 100mg
Sodium: 510mg

Tuesday, September 9, 2008

Thick and Chewy Chocolate Chip Cookies


One of the gifts my husband bought for me for our first Christmas together was a cookbook titled "The New Best Recipe" by the people at Cook's Illustrated. I am not sure if he knew it at the time but it's a really great cookbook. I have heard many people rave about the chocolate chip cookie recipe so I decided to give them a try. They are the best chocolate chip cookies I have ever made. I have made them many times and I usually pre measure the dough balls and freeze them. That way I can always have fresh hot cookies and I only have a few to tempt me. When I do this I cook them for 18 minutes.
One thing I have learned from this recipe is to weigh my ingredients instead of measuring them. It makes it so much easier. You get the exact amount every time and use less measuring cups so there is less to clean up. I now do this for all of my baking and cooking.

Thick and Chewy Chocolate Chip Cookies
2 1/8 cups bleached all-purpose flour (about 10 1/2 ounces)
1/2 teaspoon
table salt
1/2 teaspoon baking soda
12 tablespoons unsalted butter (1 1/2 sticks), melted and cooled slightly
1 cup
brown sugar (light or dark), 7 ounces
1/2 cup granulated sugar (3 1/2 ounces)
1 large egg
1 large egg yolk
2 teaspoons vanilla extract
1 - 2 cups
chocolate chips or chunks (semi or bittersweet)
Instructions
1. Heat oven to 325 degrees. Adjust oven racks to upper- and lower-middle positions. Mix flour, salt, and baking soda together in medium bowl; set aside.
2. Either by hand or with electric mixer, mix butter and sugars until thoroughly blended. Mix in egg, yolk, and vanilla. Add dry ingredients; mix until just combined. Stir in chips.
3. Following illustrations below, form scant 1/4 cup dough into ball. Holding dough ball using fingertips of both hands, pull into two equal halves. Rotate halves ninety degrees and, with jagged surfaces exposed, join halves together at their base, again forming a single cookie, being careful not to smooth dough’s uneven surface. Place formed dough onto one of two parchment paper-lined 20-by-14-inch lipless cookie sheets, about nine dough balls per sheet. Smaller cookie sheets can be used, but fewer cookies can be baked at one time and baking time may need to be adjusted. (Dough can be refrigerated up to 2 days or frozen up to 1 month—shaped or not.)
4. Bake, reversing cookie sheets’ positions halfway through baking, until cookies are light golden brown and outer edges start to harden yet centers are still soft and puffy, 15 to 18 minutes (start checking at 13 minutes). (Frozen dough requires an extra 1 to 2 minutes baking time.) Cool cookies on cookie sheets. Serve or store in airtight container.

Monday, June 9, 2008

Zucchini Bread


Our garden is producing zucchini at a very rapid pace. We have had roasted zucchini and sauteed zucchini so the logical next step was zucchini bread. I used a recipe from Cooking Light. I cut the recipe in half because I only wanted one loaf to make sure I liked it (and because I only have one loaf pan). It was quite good for being somewhat healthy. I am probably going to keep trying recipes just to use up more zucchini.
Zucchini Bread
2 cups coarsely shredded zucchini (can also use bananas for Banana Bread)
3 cups all-purpose flour (I used half all-purpose flour and half whole wheat flour)
1 3/4 cups sugar
1 teaspoon baking soda
1 teaspoon salt
1 teaspoon ground cinnamon
1/4 teaspoon baking powder
3/4 cup applesauce
1/2 cup egg substitute
1/3 cup vegetable oil
1 tablespoon vanilla extract
Vegetable cooking spray
Preparation
Preheat oven to 350°.
Place zucchini on several layers of paper towels, and cover with additional paper towel. Let stand 5 minutes, pressing down occasionally. Set aside.
Combine flour and next 5 ingredients (flour through baking powder) in a large bowl, and stir well; make a well in center of mixture. Combine zucchini, applesauce, egg substitute, oil, and vanilla; add to dry ingredients, stirring just until dry ingredients are moistened.
Divide batter evenly between 2 (7 1/2 x 3-inch) loaf pans coated with cooking spray. Bake at 350° for 1 hour and 15 minutes (I only cooked mine for 1 hour and it was done) or until a wooden pick inserted in center comes out clean. Let cool in pans 10 minutes on a wire rack; remove from pans, and let cool completely on wire rack.
Yield
2 loaves, 28 servings (serving size: 1 slice)
Nutritional Information
CALORIES 128(20% from fat); FAT 2.8g (sat 0.5g,mono 0.8g,poly 1.3g); PROTEIN 1.9g; CHOLESTEROL 0.0mg; CALCIUM 9mg; SODIUM 136mg; FIBER 0.5g; IRON 0.8mg; CARBOHYDRATE 23.9g
Cooking Light, APRIL 1996

The Garden Continues to Grow

Look at all of these zucchini! They seem to grow overnight. Those are two differnt sets that were picked in addition to the others that I have already posted. The tomatoes are also really starting to turn red quickly. I am going to have to start giving these away to people because we can't eat them fast enough. I have a feeling I will be posting a lot of zucchini recipes until the plants are gone.


Friday, June 6, 2008

Chicken with Fruit Salsa and a Side of Sweet Potatoes

I bought a bunch of fruit and wanted to do something with it. I have had mango salsa with chicken before and loved it. I had some fresh peaches, pineapple, and mango so I threw them together with some sweet onion and orange bell pepper. I even added a few dashes of tabasco sauce. It tasted really good and went great with the chicken I cooked up in the pan. We also had some sweet potatoes so I cooked them, mashed them, added some Smart Balance Light, nonfat milk and brown sugar Splenda. They were so good. Sweet potatoes are becoming one of our favorite vegetables. I am looking forward to finding new ways to cook with all the delicious summer fruit.

Wednesday, June 4, 2008

Chinese Takeout Orange Chicken


I got this recipe from the Nest's What Cooking board. The blog I got it from was http://beansbistro.blogspot.com/. My husband and I both really like orange chicken but we don't like how bad it is for you. When I found this recipe I knew I had to try it. This was second time making it and I think it is now almost perfect with the changes I made. We put it over brown rice to make it a little healthier. Here is the original recipe with my changes.

Chinese Take-Out Style Orange Chicken
Modified mostly from A Baker's Dozen
1.5 Lbs. Stir-Fry Cut Chicken (or breasts cut into very thin, long strips) I used 2 boneless skinless chicken breasts cut into strips
3 Tbsp. Flour
Salt & Pepper
1/4 tsp. Orange Zest
2-4 Tbsp. Vegetable Oil
1 Large Garlic Clove, minced
2 Green Onion Stalks, chopped (I used 3 stalks)
Juice from 3/4 Orange (I used the whole orange)
2-3 Tbsp. Rice Vinegar (I only put in about 1 1/2 T)
2-3 Tbsp. Soy Sauce
1 Tbsp. Sesame Oil (I omitted this time because I did not like it last time)
1/4 tsp. Grated Fresh Ginger (we don't like ginger so I omitted)
1/8 tsp. Red Pepper Flakes (I put in about 1/2 tsp)
1/2 C. Brown Sugar (This is a nice amount. I halved the original amount, and if you want, you could bring it down to 1/3, maybe even 1/4.) I used 1/3 cup (after trying 1/2 cup last time) but will probably try 1/4 cup next time.
1/2-1 C. plus 1/3 C. Water
1 Tbsp. Cornstarch
Sesame Seeds (didn't use)

In a large ziplock bag, mix together flour, salt, pepper, and orange zest. Add in chicken and shake to coat all the meat.
In a large saute pan, heat the vegetable oil over medium-low heat. When it is hot, add in as much chicken as will comfortably fit and brown on all sides. I had to cook the chicken in 2 batches.
When the chicken is cooked, remove to a plate with a papertowel to drain. Keep warm. (I only did this with one batch as my sauce was ready when the second batch was finished.)
While the chicken pan is heating and the chicken is cooking, get a medium saucepan going over medium heat with a dash of olive/ veggie oil.
Saute the garlic and green onions for a minute or two until the garlic is soft, but not browned.
Add in the ginger, vinegar, soy sauce, sesame oil, OJ, and red pepper, 1/2 C. water. Stir and bring to a gentle boil.
Stir in the brown sugar until it melts. Continue letting the sauce simmer, thickening up.
Mix together the remaining 1/3 C. of water and the cornstarch. Stir into the sauce to make it a nice thick consistency.
Taste the sauce and add more water as you see fit to get the flavor and texture you desire. I put in enough water so that the consistency was thick enough to coat, but thin enough that it flows and that it wasn't overly sweet.
With the sauce and chicken both done, put the chicken back in the large saute pan over low heat. Pour in the sauce and stir to coat the chicken.
Plate the chicken and sprinkle with sesame seeds.